
This site may contain affiliate links. If you purchase an item using one of these links, I may make a small commission. I only recommend products I use myself so you can be confident that my recommendations are tested and trusted.
With back-to-school ads ringing in our ears we are all wondering how to make packing school lunches easier. As a parent of a 6-year-old and a 4-year-old, I was thoroughly stressed about this task.
Though I have one school year under my belt I was still feeling nervous about what to pack, and how to prep and organize my household.
If you’re feeling this way as well, you are not alone!
I took a deep breath and started thinking about what worked for us last year. How did we manage to pack roughly 180 lunches last year?

It turns out that it just took a little bit of observation, planning and a whole lot of patience.
The key piece of advice I can share is don’t be too hard on yourself!
So let’s get started on how you can make packing lunches easier.

2. Use Leftovers
The second step is rummaging through your fridge to figure out if any of your kid’s favourite foods are already in there.
Don’t be afraid of hot foods. Use a thermos to pack pasta, nuggets, eggs, chilli, hot dogs, etc.

My kid prefers foods at room temperature but still loved finding a thermos in her lunch bag.
It’s a great way to create novelty and make them excited about these foods.
3. Create a Freezer Stash
Having a freezer stash of delicious foods makes packing lunches so much easier.
The next time you’re making pancakes for breakfast, double
your batch and freeze the extra. Check out our blue pancakes, green pancakes and pink pancakes to add some colour too!
Check out our YouTube video on How to Freeze Pancakes.
Include your child in the food prep process by baking muffins together. You get a fun activity and a freezer full of healthy muffins all in one. Try out our lentil muffin recipes:
There is nothing more fun than breakfast for dinner. Three of my favourite freezer-friendly breakfast recipes make the perfect lunch:
The freezer stash also includes frozen fruit and veggies, which are just as good as fresh. Our kids love frozen blueberries in their yogurt and frozen strawberry smoothies.

I also often rely on frozen corn, peas and edamame as a relatively quick veggie to add to the lunch box.
4. Stock the Pantry
Canned and jarred fruit is just as good as fresh, especially when out of season fresh fruit is very pricey. The best way to prevent getting stuck without fruit is to always have some non-perishable fruit in the pantry.
The favourites in our house are jarred peaches in water, apple sauce, canned pears, and clementines.

The pantry is also great for packaged snacks. Don’t be afraid to rely on granola bars, cereal bars, cookies, crackers and other treats. You don’t have to use these every day but it’s great to have them on hand when you’re in a pinch.
But also, it’s okay to pack these every day! No judgement here.
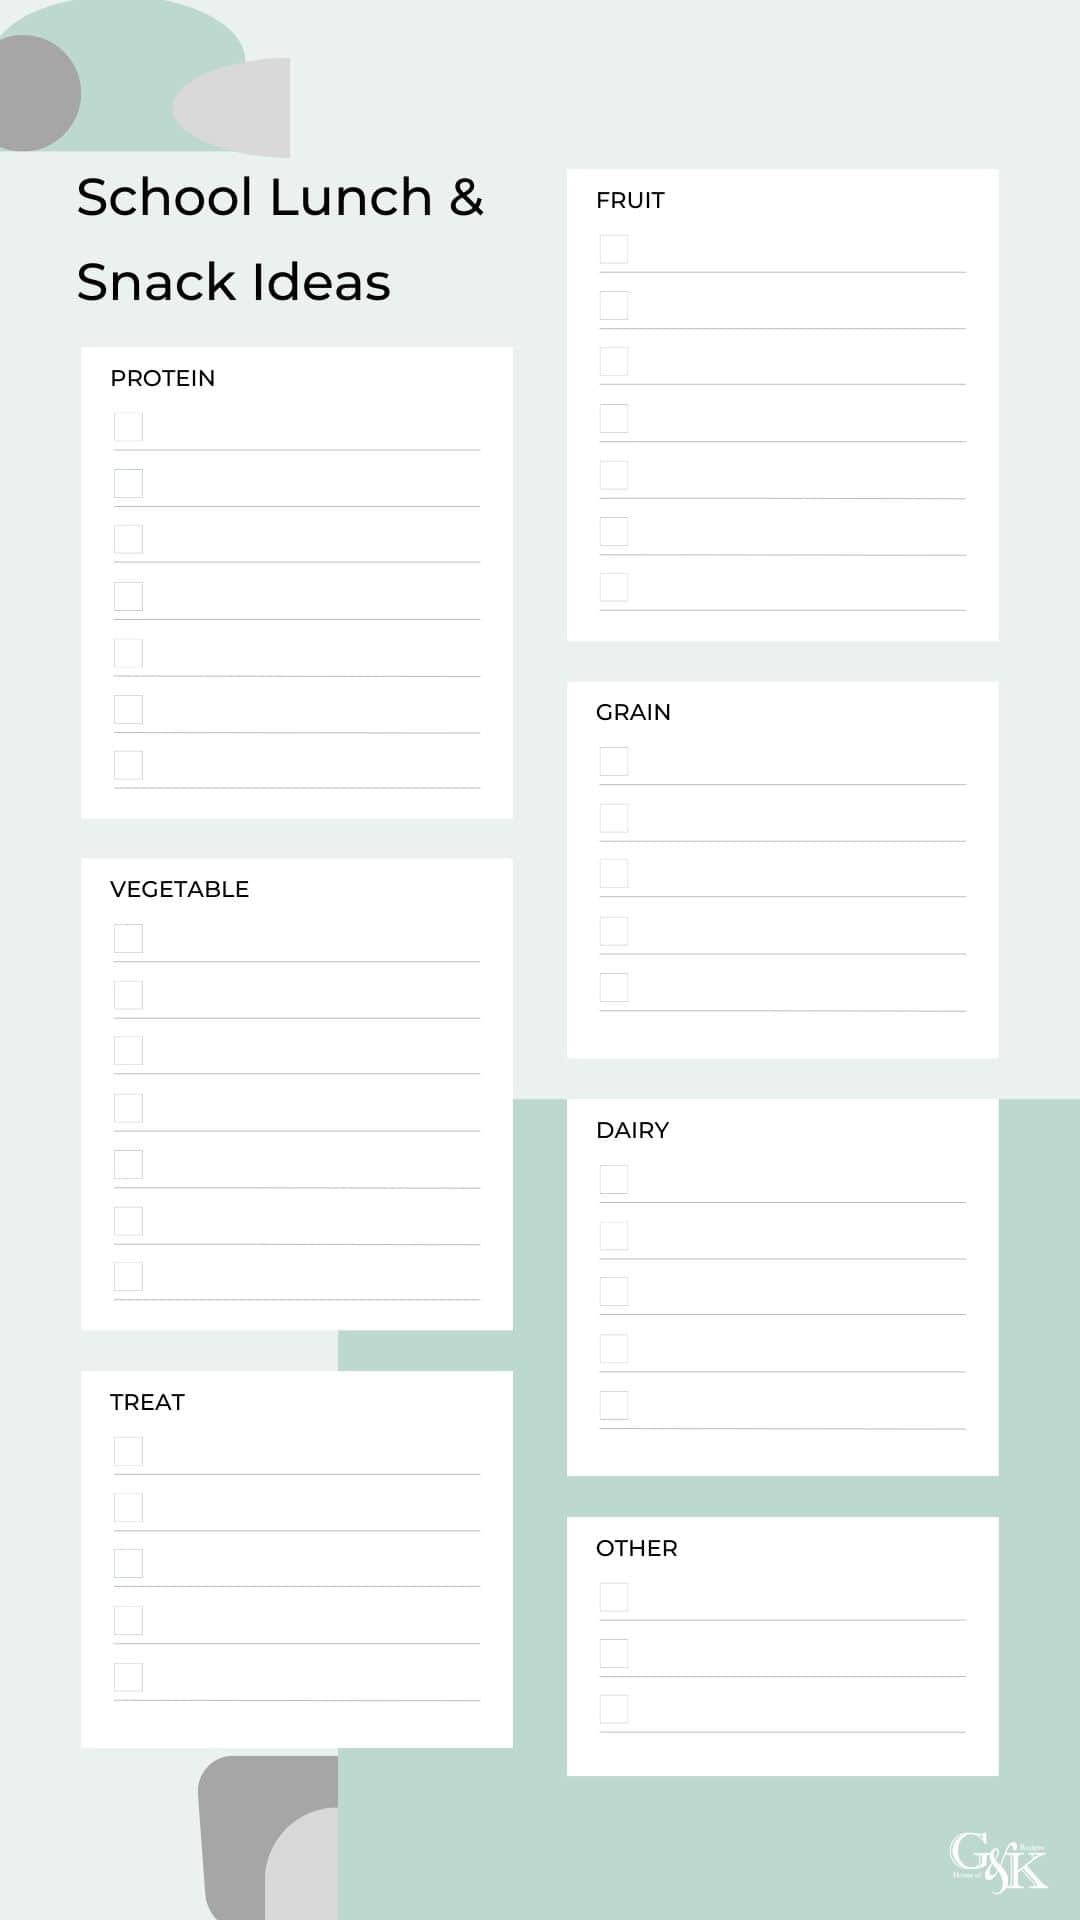
5. Keep it Simple
You don’t need to pack a different lunch every single day, and different meals every single week. Stick with what works.

If your kid likes 5 or 6 things then just rotate the same few things and switch it up with fruit and veggies as much as you can. I bet they won’t even notice. In fact, they may even appreciate the predictability.
For our picky eater we have one meal for each day of the week and we swap out the snacks depending on what we have. The only veggies she will eat are carrots, cucumber (yes, I know its technically a fruit), and sometimes canned corn. Here is out current rotation:
- Monday: Bagel with cream cheese – just as simple as it sounds with a sprinkle of hemp seeds
- Tuesday: Sandwich – for us this is a cheese and ketchup sandwich, not to be confused with a grilled cheese, this is just butter, a slice of havarti cheese and some ketchup
- Wednesday: Leftover pasta or oatmeal, or freezer stash pancakes
- Thursday: english muffin pizza – english muffins, pizza sauce, mozzarella cheese all toasted in the oven for 10 minutes
- Friday: Snack lunch – pepperoni, cheese string, hard boiled egg (whites only), crackers with cream cheese, fruit and veggie


